Blog 12 – “Fail – First attempt in learning”
Hi! How are you
all? Sorry it’s been so long since my
last Blog – it’s simply that because I’ve been working hard on my HBS 28th
Creatin’ Contest kit there hasn’t been a great deal for me to share. And to be honest, that’s probably one of the reasons
I won’t enter again next year – that and the fact that we’ll hopefully be
building a full size house by then!
So today I thought I’d share some of the side things I’ve
been working on in conjunction with the CC kit.
The number one thing I love most about Miniatures is the
ability to switch between so many different crafting techniques and
materials. I love to push myself and
whilst I am a perfectionist and I’m often disappointed in my work, I also
realise that with all these failures come learning opportunities. Instead of
quitting after the first attempt I try and try again – usually with large gains
of knowledge.
Let’s be real – how many of us watch tutorials on YouTube
and think ‘Oh that looks easy I’m going to have a go!’? I know I do!
Just 2 months ago I offered to bind a book for my son’s
university course. For the type of
binding preferred it was ridiculously expensive as a one-off, so my son took a
previous bookbinding attempt of mine into his lecturer to make sure it was
okay. Sure enough, they said go for it. Well, the end result wasn’t perfect and I felt
that I’d let my son down big time (he’s an A- average student) – although he
was relatively happy with it. I also
could see where it was that I’d gone wrong.
Unfortunately, it was a one-off shot at it and the next day he took it in
to submit.
With this experience in mind, I decided to follow a tutorial
on YouTube by the new channel Lady Miniac on creating miniature books.
https://www.youtube.com/channel/UC0vLfQajfm23qp5oPAbyNpQ
I have made stacks of mini books in the past. Most recently I made this chained library – one of my most favourite pieces.


Lady
Miniac’s tutorial however, not only supplied all the printables freely, but
literally created miniature properly bound books – just like the full size one
I did a couple of months ago.
Here in NZ we’re in winter and while in Auckland we don’t
have terribly cold weather – maybe 5 frosts a year tops, it has been grey and
wet. So there are days where I really
don’t want to leave the house – even though it’s a short walk across the deck
to my cottage. So I set myself up at the
dining table instead and tried hard to ignore the mess.
Over a few days, after making sure I had everything I
needed, I worked to follow Lady Miniac’s tutorial on creating these gorgeous
1:12 medieval books/manuscripts. Now I
normally don’t follow tutorials exactly – just like recipes, but I did for
these and they turned out, for the most part, pretty good! There are bits that I’m not 100% pleased with
– like the fly-leaves, but like anything, the more you do it, the better you
would become at it. Certainly, I really
enjoyed the process and will no doubt do it again in the future. I highly recommend anyone who enjoys
papercrafts to give this a go.


The next thing I have attempted – am currently attempting, is to make a resin holographic image.
You’re probably all raising your eyebrows at me knowing how
much ‘fun’ I had creating my resin stream for last year’s CC entry. But I’ve used resin a lot over the past
couple of years and put the issues with the stream down to having never created
anything so large before.
I started using resin when I was building my Master Raymond’s
Apothecary. Being so far away from the
rest of the world has it’s positives – ie being able to keep Covid largely out
of the country. However, it does also
mean that purchasing anything from anywhere else can be really expensive,
especially when you take into account the current value of our NZ$ and postage
costs.
For the Apothecary, I used the Parisian Outlander set
designed by Jon Garry Steele as my guide.
In fact, I attempted to authentically recreate as much of it as possible
in the 1:12 space that I had. One of the
main details were of course the bottles on the shelves. Most, especially in that era, would have been
white porcelain instead of clear glass.
I did spend a reasonable amount on bottles but knew I didn’t want to
purchase them all. So instead I created
my own 2 part molds from the bottles I’d purchased and used white resin to
create porcelain-like white bottles for my shelves.
Of course this was a huge learning curve having never
created molds or used resin before. But I
had really good success which lead me to believe that working with resin was a
doddle! Fast forward the CC stream……
As I think I’ve mentioned before, the stream was considered
a ‘deep pour’ which I didn’t initially realise.
The first clear resin I used ended up having a major exothermic reaction
(which I didn’t understand at that point), heating up very quickly and turning
cloudy or white because of this reaction.
Before completely curing I wiped as much out as I could at the time and
then had to chisel the rest out once hard.
I phoned around suppliers and ended up purchasing a clear resin that has
very slow cure time but which is very good for deep pours.
Unfortunately, that resin also required a high ambient
temperature and given that it was again, in the middle of winter, despite
leaving the heat pump going overnight the resin didn’t cure completely. I had to scrape away all the sticky uncured
stuff and then pour again. This time I
made a ‘heat box’ with blankets and a heater which I left going for about 6
hours.
Fast forward to what I’m attempting now. You know how YouTube leads you down paths
that you wouldn’t have known about otherwise?
Well I came across this really cool idea to create a holographic image
using clear resin. It caught my
imagination and I had to try my own version of this.
You can view the video here - https://www.youtube.com/watch?v=4UCkFWFJcwE
In my defense – he made it look so easy!!!!!
I truly thought – oh I can do that. No problem! Hah. I decided to make two so as to give me a greater chance of success. I used the plastic packaging that small round batteries come in and hot melt glued those to my vinyl resin mats for the space for the light. I used acrylic sheet that I had to make the box surrounds and hot melt glued those to the mat. This will ensure no resin escapes. I successfully cast the white base and then set about casting the clear heads in molds that I already own.

As I had leftover Alumilite water clear, I
made this up according to the directions on the bottles which was a mix ratio
by weight 1:1 – easy.
Except it didn’t cure.
24 hours later it was still sticky.
I cleaned out the molds and by this stage had received a new set of
Alumilite clear cast resin. This was
mixed 1:1 by volume. I prepared it
again, stirred very carefully and poured.
Thankfully this time it set and 24 hours later I was able to de-mold
them.

This morning I have placed the clear heads on top of the
clear packaging bubble (where the light goes) and I have mixed large quantities
the clear and poured very carefully, trying to dislodge any air bubbles. I have done everything I can to dislodge air
bubbles – mixing carefully and slowly; pouring very slowly into one place and
using the gas torch to gentle pop surface bubbles.

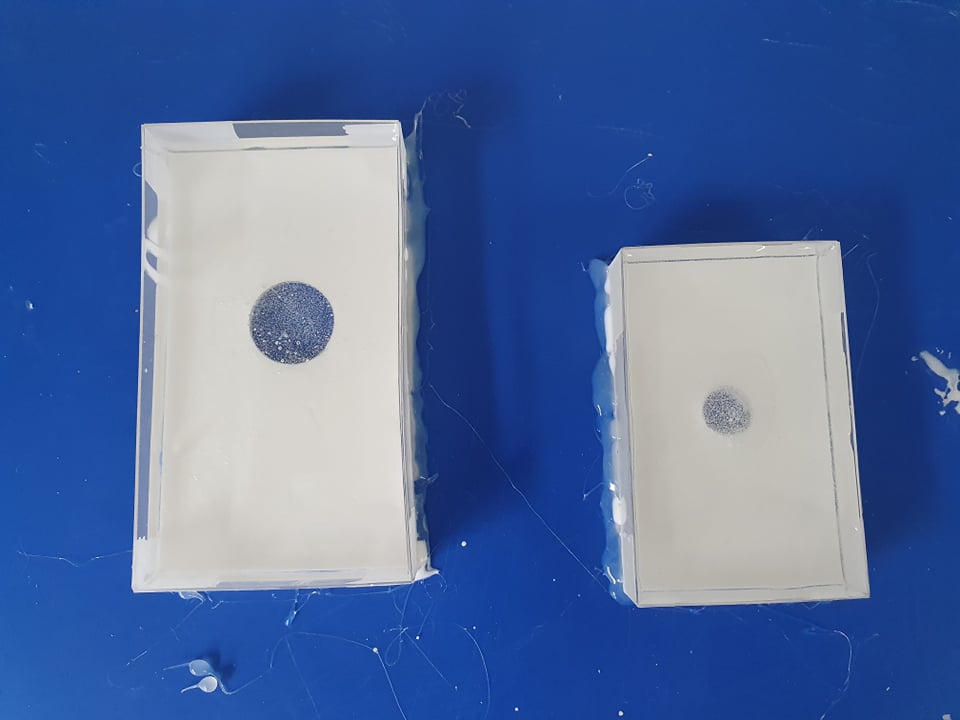
They’re looking okay.
The bigger one is not as thick and so looks clearer at this point while
the smaller, thicker one looks quite cloudy.
I’m sure they will cure fine but I won’t even bother to look at them
until this evening and it won’t be until tomorrow morning before I can de-mold. SO I’ll have to leave you all hanging! However, I will do an update – hopefully with
some working holographic resin pictures……stay tuned.
In the meantime, while that cures, it’s now lunchtime and
then I’m out to my cottage to continue on with my build.
Please remember to leave me any questions or comments and
I’ll be happy to answer when I can.
Stay creative and enjoy your quirks,
Rebecca xx


Oh the highs and lows of resin! You have the magic formula, though: tenacity! I hope that the holograms come out great, and that you learn new tricks to make each effort successively easier. I love the desk and the books! They are wonderful! Can't wait until you can share more about the CC! Hope you're having fun with it!
ReplyDeleteThanks Jodi. Unfortunately they didn't turn out despite the resin setting up well. I really need a vacuum chamber to pull all the bubbles out as despite doing everything I could to limit them, it really wasn't overly clear. So now I'm searching for another way of achieving a similar result. UGH!
DeleteThe face in the resin is so cool! I know you will find a suitable fix to achieve what you have in mind. I look forward to seeing your CC entry. You say you won't enter again, but after a few years break you might be inspired. It was great to see your post.
ReplyDeleteThanks Carrie. Yes already following another train of thought! Lol, can't keep a good woman down. I've enjoyed entering - I love the challenge of creating something out of a basic building and knowing that every single person will have thought of it in a different way so never say never I guess. Yep, understand now how hard it is to keep up a blog! :)
Delete